How to Create Consistent AI Product Images in Batches
Consistent AI product images are hard to get when every image is generated as a separate one-off. The product may stay roughly similar, but lighting shifts, camera angle changes, props drift, shadows move, and small SKU details start to vary. A catalog that should feel like one visual set begins to look like nine unrelated experiments.
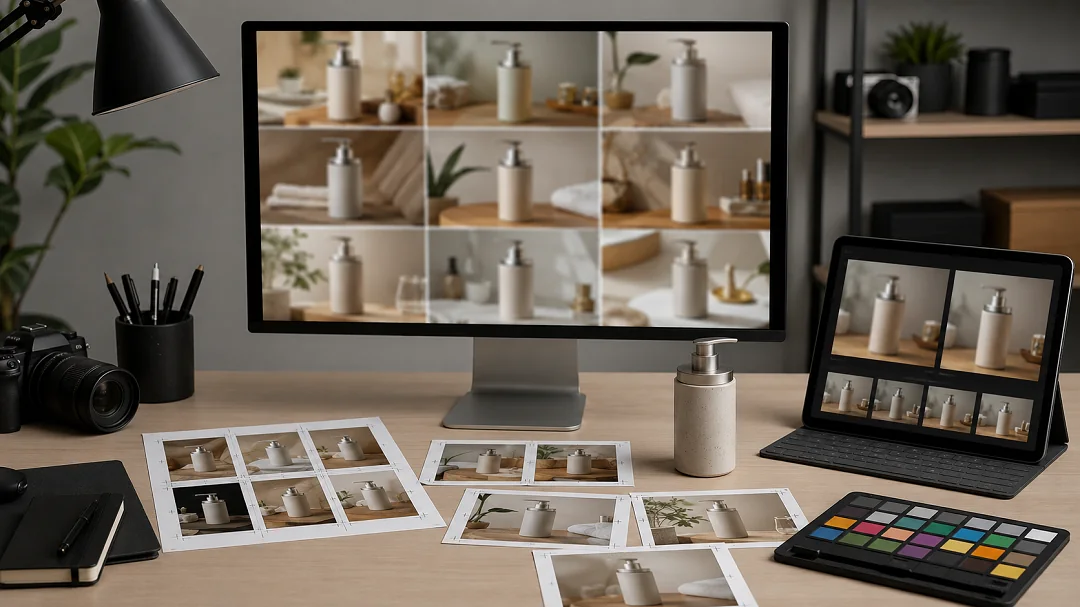
A better workflow is to generate a 3x3 grid in one pass, split the grid into separate files, then enhance each selected image with a product image upscaler. The grid keeps composition, lighting, background language, and style closer together. The upscaler makes each cropped image usable for PDPs, ads, social posts, or secondary marketplace visuals.
Quick Answer
To create consistent AI product images in batches, start with a clean source product image and a fixed visual brief. Generate a 3x3 grid of nine product image variations in the same prompt, split the grid into individual images, reject any tile with product drift, then upscale the approved images one by one. Finish with a SKU fidelity check for color, scale, material, labels, edges, shadows, and included parts.
This workflow is strongest for lifestyle support images, campaign variants, PDP sections, social content, and product-page visual testing. It is weaker for main marketplace images, regulated products, tiny labels, reflective jewelry, technical parts, and any SKU where a small detail change can mislead the buyer.
Why One-by-One Generation Drifts
Most AI product image inconsistency comes from treating each output as a fresh creative request. Even with the same prompt, a model may choose a different lens, a different table, a different wall color, a different crop, or a different shadow. If the product is a bag, bottle, watch, accessory, cosmetic package, or small appliance, those small differences become visible across a product gallery.
The issue becomes worse when the prompt asks for a broad idea like "premium lifestyle product photo." That phrase gives the model room to invent. It may preserve the product in one output and reshape it in another. The product can gain a stronger reflection, a wider cap, a different label placement, a warmer color, or a slightly different size.
Community discussions around AI product photography often repeat the same complaint. Sellers can generate one good image, but consistent batches are harder. Product placement, brand feel, lighting, and SKU detail drift across multiple runs. Some operators have started using grid outputs because the images are generated inside one visual context and feel more related than separate generations.
The grid reduces style drift and gives the operator a better review set, while product truth still depends on a careful final check.
When the 3x3 Grid Workflow Makes Sense
A 3x3 grid is useful when the product needs a family of related images, not one perfect hero. It works especially well for campaign variations, lifestyle scenes, product education modules, collection images, thumbnails, ad concepts, and social content. It also helps when a team needs several options quickly but wants the same product angle, background mood, and lighting family.
For example, a skincare brand may need nine soft bathroom-counter variations for a PDP and email campaign. A small electronics seller may need nine desk-use scenes where the product angle stays similar. A home goods brand may need several neutral room scenes for product-page testing. In all three cases, separate prompts can produce a messy set. A grid prompt gives the model one canvas and a tighter instruction.
Use the workflow when the images can be reviewed as supporting visuals. Be more cautious when the image is the main product proof, the marketplace main image, the legal claim image, or the only visual that explains what ships in the box.
The Professional Workflow
Start with the product identity before writing the image prompt. The source image should show the real SKU clearly. If the source photo is blurry, compressed, color-shifted, or poorly cut out, use image enhancement or retouching before generating the grid. Weak source files create weak consistency.
Define the product details that must not change. This usually includes color, material, logo placement, label text area, shape, proportions, ports, seams, cap, strap, handle, bundle contents, and visible texture. Write those constraints into the brief, even if the final prompt has to stay concise.
Then generate the 3x3 grid as one image. Keep the camera distance, product scale, background type, lighting, and mood locked. Ask for nine variations that share the same product position and visual system. Avoid asking for nine totally different scenes. The more variety the prompt demands, the more drift the set will carry.
After generation, inspect the full grid first. Avoid splitting every tile automatically. Reject tiles where the product has changed, the crop is too tight, the background overpowers the product, or the props imply unsupported use. Split only the approved grid or save all nine files with a reject/approve note.
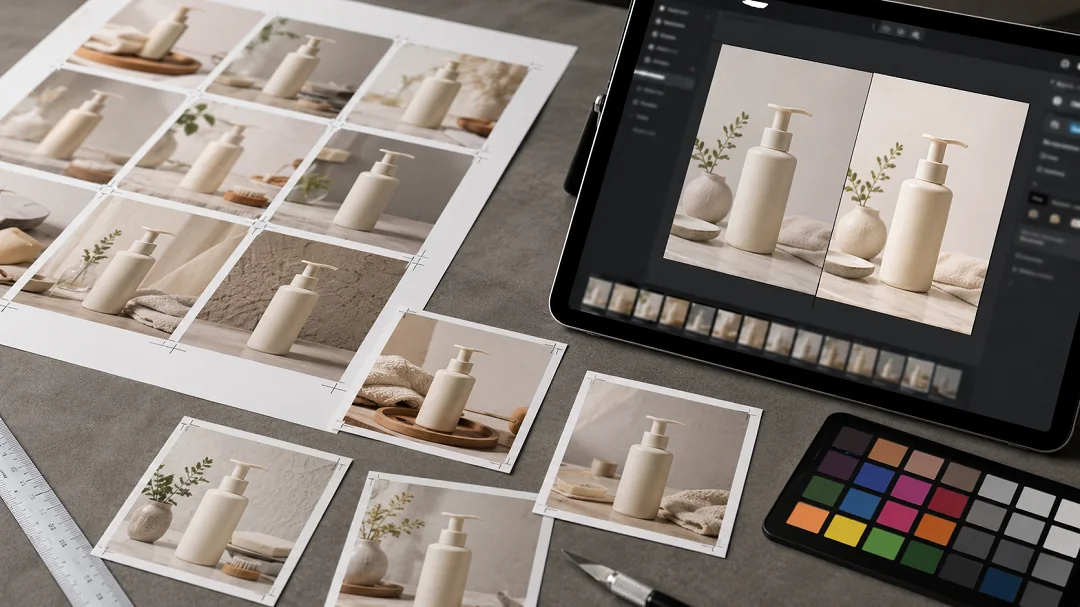
The split step should preserve tile edges cleanly. Use equal crop regions if the grid is perfectly regular. If the model created uneven spacing, crop manually or use a layout-aware editor. Crop first, then upscale each approved image from the cleanest individual tile.
Run each tile through a product image upscaler or image enhancer. The enhancer should improve clarity, not rewrite the product. Review the upscaled output against the source product image and the original grid tile. If the upscaler sharpens a wrong label, changes fabric texture, invents reflections, or makes the product look more premium than the real SKU, reject that file.
Prompt Structure for a 3x3 Product Grid
Use a prompt that controls the set as one production batch. The product should stay fixed while the composition changes in small, useful ways.
```text Create a 3x3 grid of nine consistent ecommerce product images using the same product identity, camera angle, lighting family, product scale, and visual style.
Product reference: [describe the source product and critical details] Use case: [PDP support images / lifestyle variants / ad concepts / social content] Scene family: [neutral studio / kitchen counter / desk setup / bathroom shelf / living room] Consistency rules: same product shape, same color, same material, same logo/label placement, same approximate camera distance, same shadow direction. Variation rules: change only small background details, prop placement, surface texture, or composition spacing. Keep product size, label, color, included accessories, connector shape, fabric texture, and material finish unchanged. Avoid text overlays, logos, watermarks, and fake UI. ```
This prompt keeps the system from turning the grid into nine unrelated images. If the tool supports reference images, use the best source product photo as the anchor. If it supports seed or style locking, keep those settings stable. If it supports batch mode, still review the final set as a product-image QA task, not a creative gallery.
Split and Upscale Without Losing Quality
The split step is where many batches lose quality. A 3x3 grid can look sharp as a single preview, but each tile may be too small after cropping. That is why the image enhancer comes after splitting. Upscaling the whole grid first can waste pixels on gutters and grid spacing, while upscaling each tile gives the final asset more usable detail.
Use this order:
- Save the original grid.
- Crop each approved tile into a separate image.
- Name every file with SKU, scene type, tile number, and approval status.
- Upscale each approved tile individually.
- Compare the upscaled result with the real product.
- Export only the images that pass product QA.
A useful naming pattern looks like "sku123-lifestyle-grid01-approved-upscaled.webp". The plain filename prevents teams from losing track of which outputs came from the same grid and which files are safe for publishing.
For ecommerce, review the upscaled image beyond full size. Check the product-grid thumbnail, PDP hero slot, mobile crop, and any ad placement where the image may appear. An image can look consistent as a full-size asset and still fail when a mobile crop cuts off the product or hides the detail that matters.
QA Checklist Before Publishing
The final review should compare the image set and each individual image. Consistency is a group property.
| Check | What to review | Fail signal |
|---|---|---|
| Product identity | shape, color, material, label area, edge detail | one tile looks like a slightly different SKU |
| Camera and crop | angle, distance, product scale, empty space | product jumps around across the set |
| Lighting | shadow direction, highlight intensity, white balance | one image feels warmer, flatter, or glossier |
| Background family | surface, room style, props, category fit | the set feels like unrelated campaigns |
| SKU truth | included parts, ports, caps, straps, texture | image implies accessories or features outside the shipped product |
| Upscale quality | edges, labels, fabric, reflections, compression | enhancer invents sharpness or false texture |
| Channel fit | PDP, marketplace, ad, email, social | image style works in one channel but misleads in another |
At that point, the 3x3 method becomes professional, not experimental. The grid produces candidates. The split and upscale process prepares files. QA decides which images deserve to become product content.
LoomaDesign Workflow for Batch Consistency
LoomaDesign fits the middle of this workflow. A seller can use AI Product Image Generator for Ecommerce to plan the visual set, then use the AI Product Image Enhancer after each grid tile is split. If the source file is weak, start with How to Fix Pixelated Product Photos or Unpixelate Image for Ecommerce Product Photos before generating the grid.
For product-page use, connect the final images to the page job. A clean grid can produce lifestyle support images, comparison visuals, feature tiles, or campaign tests. For full PDP planning, use Product Detail Page Design AI. For marketplace image stacks, use Amazon Listing Image Generator.
Common Mistakes
The first mistake is asking for too much variety. A 3x3 grid should create controlled variants, not nine different creative directions. If the prompt changes background, angle, season, props, and mood at once, consistency will drop.
The second mistake is upscaling bad tiles. If the product changed in the grid, the upscaler will make the wrong version cleaner. Upscaling is a finishing step, not a product-fidelity repair step.
The third mistake is using the workflow for every image slot. A grid-generated scene may be useful for secondary PDP visuals, ads, or social content, while the main product image may still need a strict studio or marketplace-compliant asset.
The fourth mistake is ignoring product category risk. Simple matte products tolerate more AI variation. Jewelry, beauty shade products, glass, reflective packaging, technical parts, food, and apparel need stricter review because small visual changes can alter buyer expectations.
FAQ
Why use a 3x3 grid for batch images?
A 3x3 grid keeps the images inside one visual context, which can reduce lighting, camera, background, and style drift. Separate generations often behave like separate shoots, even with the same prompt.
Should I upscale the grid before splitting it?
Usually no. Split the grid first, then upscale each approved tile. Upscaling the entire grid wastes pixels on borders and spacing, and it can make individual crop control harder.
Can this workflow create Amazon main images?
Use caution. The method is better for supporting images, lifestyle scenes, PDP modules, ad tests, and social assets. Amazon main images and strict marketplace slots should follow current channel rules and may need a cleaner studio workflow.
How many images should I keep from a 3x3 grid?
Keep only the images that pass product QA. It is normal to reject several tiles. A useful batch of four accurate images is better than nine visually similar files with SKU drift.
What products are risky for this workflow?
Jewelry, watches, beauty shade products, transparent packaging, reflective products, food, apparel fit images, and technical accessories need closer review. The method can still help, but the final approval standard should be higher.
Sources and Research Notes
- Reddit and ecommerce community discussions around AI product photo consistency, batch generation, product placement drift, and grid/upscale workflows were reviewed for recurring objections and operator phrasing.
- AI Product Image Generator for Ecommerce covers the broader tool-selection and workflow question.
- Unpixelate Image for Ecommerce Product Photos covers image recovery limits after cropping or upscaling.
- How to Fix Pixelated Product Photos covers source-quality problems before AI generation.